vSphere 5.0 can be confgured to enable VMware ESXi host swapping to a solid-state disk (SSD). In the low host memory–available states (high memory usage), where guest ballooning, transparent page sharing (TPS) and memory compression have not been sufcient to reclaim the needed host memory, hypervisor swapping is used as the last resort to reclaim memory from the virtual machines. vSphere employs three methods to address limitations of hypervisor swapping to improve hypervisor swapping performance.
Sunday, January 29. 2012
Video - Configure ESXi host swapping to a solid-state disk
vSphere 5.0 can be confgured to enable VMware ESXi host swapping to a solid-state disk (SSD). In the low host memory–available states (high memory usage), where guest ballooning, transparent page sharing (TPS) and memory compression have not been sufcient to reclaim the needed host memory, hypervisor swapping is used as the last resort to reclaim memory from the virtual machines. vSphere employs three methods to address limitations of hypervisor swapping to improve hypervisor swapping performance.
Saturday, January 28. 2012
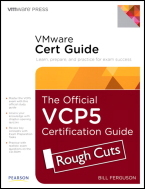
New Book - The Official VCP5 Certification Guide
 This is the first and only official guide to VMware's new VCP510 (VCP 5) exam. Organized to follow VMware's newest exam blueprint, it's also designed from the ground up to be both engaging and enjoyable. Author Bill Ferguson acts like a "study buddy," encouraging virtualization professionals, anticipating their questions, and helping them gain both mastery and confidence. Throughout, he provides many illustrations, tables, figures, screenshots, and realistic sample test questions - all designed to help readers learn more, learn faster, and remember more of what they learn. Coverage includes: * Understanding how virtualization can best be integrated into today's real-world IT environments * Recognizing what to change, and what to leave alone * Planning, installing, configuring, and upgrading vCenter Server and VMware ESXi * Planning and configuring vSphere networking and storage * Deploying and Administering Virtual Machines and vApps * Establishing and Maintaining Service Levels * Performing basic troubleshooting * Monitoring vSphere implementations * Managing vCenter Server alarms * Preparing for the future of VMware virtualization.
Friday, January 27. 2012
Video - VMware vCenter Infrastructure Navigator - Install and Configure
VMware vCenter Infrastructure Navigator is an application awareness plug-in to vCenter Server, and provides continuous dependency mapping of applications. Infrastructure Navigator offers application context to the virtual infrastructure administrators to monitor and manage the virtual infrastructure inventory objects and actions. Administrators can use Infrastructure Navigator to understand the impact of the change on the virtual environment in their application infrastructure.
Infrastructure Navigator helps virtual infrastructure administrators perform the following tasks:
- Make accurate first-level triage to help either eliminate the problem or associate the problem with the virtual infrastructure when business service users report problems.
- Assess change impact, manage, and communicate virtual infrastructure issues for critical applications.
- Understand the application and business impact of changes to the virtual infrastructure on applications.
- Simplifies and automates the deployment and the discovery process and keeps manages Application Component Knowledge Base (KB) current Eliminates physical switch spanning or credential based discovery.
- Discovers and maps the application components and dependencies using KBs and presents this knowledge through maps or search for relevant use cases.
- Provide Infrastructure Navigator data for vCenter Server and related solutions Ensures that the application and dependency data is available to the rest of the vCenter Server entities and its various solutions through the vCenter extensibility APIs.
- Supports SRM integration to set up more focused and accurate site recovery and backup plans.
Thursday, January 26. 2012
Video - Installing vCenter Server 5.0 - Quick Start
VMware vCenter Server allows you to centrally manage hosts from either a physical or virtual Windows machine, and enables the use of advanced features such as vSphere Distributed Resource Scheduler (DRS), vSphere High Availability (HA), vSphere vMotion, vSphere Storage vMotion, and vSphere Auto Deploy. You can install vCenter Server in a Microsoft Windows virtual machine that runs on an ESXi host. Deploying the vCenter Server system in the virtual machine has the following advantages:
- You can provide high availability for the vCenter Server system by using vSphere HA.
- You can migrate the VM containing vCenter from one host to another.
- You can create snapshots of the vCenter Server virtual machine.
- Rather than dedicating a separate server to the vCenter Server system, you can place it in a virtual machine running on the same host where your other virtual machines run.
This video will show you how to install VMware vCenter Server 5.0 in a virtual machine 13 simple steps.
Step 1 > In the software installer directory, double-click the autorun.exe file to start the installer.
Step 2 > Select vCenter Server.
Step 3 > Follow the prompts in the installation wizard to choose the installer language, agree to the end user patent and license agreements, enter your user name, organization name, and license key.If you omit the license key, vCenter Server will be in evaluation mode, which allows you to use the full feature set for a 60-day evaluation period.
Step 4 > Choose the type of database that you want to use.
Step 5 > Set the login information for vCenter Server.
Step 6 > Either accept the default destination folders or click Change to select another location.
Step 7 > Select Create a standalone VMware vCenter Server instance or Join Group.Join a Linked Mode group to enable the vSphere Client to view, search, and manage data across multiple vCenter Server systems. S
Step 8 > If you join a group, enter the fully qualified domain name and LDAP port number of any remote vCenter Server system.
Step 9 > Enter the port numbers that you want to use or accept the default port numbers.
Step 10 > Select the size of your vCenter Server inventory to allocate memory for several Java services that are used by vCenter Server. This setting determines the maximum JVM heap settings for VMware VirtualCenter Management Webservices (Tomcat), Inventory Service, and Profile-Driven Storage Service. You can adjust this setting after installation if the number of hosts in your environment changes. See the recommendations in the vCenter Server Hardware Requirements topic in System Requirements.
Step 11 > (Optional) In the Ready to Install the Program window, select Select to bump up the ephemeral port value. This option increases the number of available ephemeral ports. If your vCenter Server manages hosts on which you will power on more than 2000 virtual machines simultaneously, this option prevents the pool of available ephemeral ports from being exhausted.
Step 12 > Click Install. Installation might take several minutes. Multiple progress bars appear during the installation of the selected components.
Step 13 > Click Finish.
Wednesday, January 25. 2012
Video - VMware vCenter Operations Manager 5.0 - Install and Configure
Join Hemant Gaidhani in a video walkthrough of the installation and configuration of the VMware vCenter Operations Manager, a component of the vCenter Operations Management Suite.
Tuesday, January 24. 2012
VMware vCenter Operations 5.0 - Introduction Video
Join Kit Colbert in a walkthrough oveview of the VMware vCenter Operations Manager, a component of the vCenter Operations Management Suite. These are the new Features of VMware vCenter Operations Management Suite Editions.
New Operations Management Dashboard provides comprehensive views into health, risk and efficiency scores of your cloud infrastructure. Quickly drill down to see what’s causing current workload conditions, pinpoint potential problems in the future and identify areas with inefficient use of resources.
New Correlation of Performance and Change Events inside the guest operating system enable administrators to quickly understand and remediate performance issues arising from configuration changes.
New Compliance Checking of vSphere Hosts allow administrators to maintain a compliant infrastructure and automated the hardening of vSphere hosts with pre-built security and compliance guidelines.
New Smart Alerts provide pro-active notifications of building health, performance and capacity issues in the environment. Automated root cause analysis identifies the offending metric across all layers of the infrastructure.
New Capacity Planning, Reporting and Optimization views help administrators optimize VM density; identify areas of reclaimable waste and chronic capacity shortfalls. Configurable alerts notify of changing capacity conditions in production and non-production areas.
New Integrated Cost Metering and Reporting capabilities provide visibility into the financial value of consumed resources and enable administrators to optimize provisioned capacity for lowest cost without sacrificing performance.
New Discovery and Visualization of Application and Infrastructure Dependencies bring application-level awareness to infrastructure and operations teams to ensure service levels and disaster recovery protection for all critical application services. Application components and version numbers are named automatically and updated continuously.
Monday, January 23. 2012
What happens to resource pools when vCenter goes down?
Andy Cary who works as a Senior Technical Trainer at VMware responded immediately with: I created a RP on my vCenter and turned off expandable reservations for memory. Placed VM1 under said resource pool and failed to power up because the VM need to reserve memory for the overhead of running the VM (had no reservations set on the RP). So next I directly connected to the host and powered on the VM with no problem at all. However when you go back to the vCenter it displays:

The Cluster with the RP is now invalid because it can see the VM has powered on. So the configuration about DRS RP is saved on the vCenter but it doesn’t stop you going directly to the host an powering on the VM. Now in vSphere 5.0 if you directly connect to a host and try and create a local resource pool it will throw up an error saying this isn’t allowed because it can see you are managed by vCenter, this is the case even if the Host isn’t a member of DRS cluster. So the creation and management of RP is done via vCenter, if vCenter goes down the rules cannot be applied so you could get admin powering on VMs by directly connecting to the hosts. So in summary all we have done is said “You can only create, modify resource pools via vCenter and not by directly connecting to the host”
Sunday, January 22. 2012
Video - vCloud Director 1.5 - Quick Start
Step 1 > Log in - Using a supported browser (Internet Explorer 7 or above, or Mozilla Firefox 3 or above) connect to the URL as provided by StratoGen. A typical URL is of the format https://mycloud.stratogen.com/cloud/org/your-organisation. Enter the username and password supplied to login to your account.
Step 2 > Select the ‘My Cloud’ tab - The initial homepage for your cloud is displayed. Now click on the ‘My Cloud’ tab. In the following steps I will take you through the steps required to create a new virtual machine in your cloud. All virtual machines must reside in a vApp (a vApp is a container that holds 1 or more virtual machines).
Step 3 > Click the ‘+’ symbol to create a new vApp from a catalog. You will now create a new vApp by clicking on the + icon
Step 4 > Select Catalog - You can upload your own virtual machine templates or ISO installation media into your organization’s catalog, but in this example we will be using one of the pre-built templates supplied by StratoGen. Click on the catalog drop down list and select ‘Public catalogs’.
Step 5 > Select vApp Template - Select the required operating system from the list of vApp Templates. In this example we will be creating a virtual machine with CentOS 5.5 installed, so we select the CentOS 5.5 vApp. This will create a vApp which contains a single CentOS 5.5 virtual machine.
Step 6 > Name your vApp - Enter a name for your new vApp, and a short description if required.
Step 7 > Configure virtual machine - Enter a computer name for your new virtual machine and then click on the ‘Network’ drop down list to select a network to attach it to. In this instance we will select a ‘Direct Internet Connection’. Always leave the IP assignment as ‘Static – IP Pool’. We are now ready to create our vApp and virtual machine. Click ‘Finish’.
Step 8 > vApp creation - That’s it. Your new vApp and virtual machine will now be created. Your virtual machine’s network settings will be configured automatically and a new root/administrator password will be automatically generated and assigned. We will also review our new virtual machine and note our new password.
Step 9 > vApp display - Once the creation of your vApp has completed, ‘Stopped’ will be displayed as the status. Select the vApp, and then click on the name. A visual depiction of the vApp is displayed. Now click the ‘Virtual Machines’ tab.
Step 10 > Virtual machine properties - This tab shows us the virtual machines in the vApp. In our case this is a single virtual machine called CentOS 5.5. Right click on your virtual machine and select properties. We can now view the properties of our virtual machine. To find the newly assigned root/administrator password for your VM select the ‘Guest OS Customization’ tab. Your new password is displayed after the ‘Auto generate password’ text.
Saturday, January 21. 2012
White Paper - Mobility and Disaster Recovery Solution for Virtualized Tier-1 Enterprise Applications
 To meet ever growing IT infrastructure needs and to ensure business continuity in case of a site-level disaster, it is critical to have live mobility and fully automated, efficient disaster recovery (DR) processes for virtualized enterprise applications across data centers. Failure to have a robust and efficient mobility and fully automated disaster recovery solution can result in millions of dollars of lost revenue and employee productivity.
http://www.cisco.com/en/US/docs/solutions/Enterprise/Data_Center/DCI/4.0/EMC/mobdisasterrecapps.html


